Deleting Symbols
To delete a symbol, you need to select it and press the Delete button on your keyboard. Tip: Click on the border of a symbol to select it. If you click on the text portion of the symbol, you will be in text editing mode instead. After you delete the symbol, you will most likely need to shift the remaining symbols. The following is a step-by-step guide on how to adjust the layout, given a flowchart that looks like Picture 1.

Picture 1
If you want to remove Step 2, it will leave a gap, as shown in Picture 2.
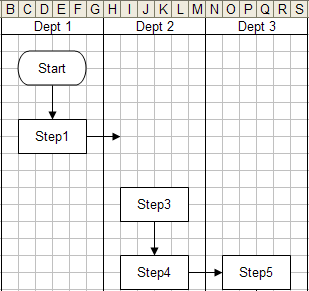
Picture 2
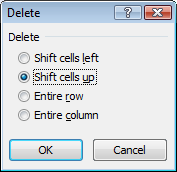
To move the other symbols, you can select multiple shapes and drag to adjust their location. However, if the flowchart is large it can be a time consuming task to. The faster way is to delete cells or rows / columns. Excel moves shapes when cells are inserted, deleted, or resized. If you select a range of cells, as shown in Picture 3, you can right-click on the cells and select "Delete..." from the context menu, and the Delete Cells dialog will open as shown in Picture 4.
You must select a range of cells as wide or wider than the symbols you want moved. For Decision symbols, the range width selected should encompass the branch labels as well as the Decision symbol itself. In the example shown in Picture 3, the range of cells selected is as wide as both the Dept 2 and Dept 3 swim lanes to ensure that all the symbols are shifted up. If you want everything shifted up, you could also delete entire rows.
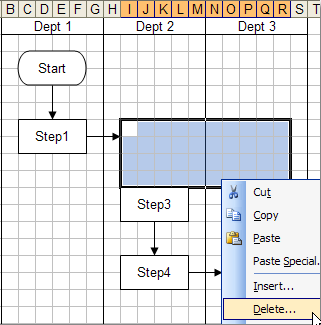
Picture 3
Picture 4
The result can be seen in Picture 5. The connector to Step 3 is not connected. Step 3 was moved into position to be connected to Step 1, but the connection still needs to be closed manually.
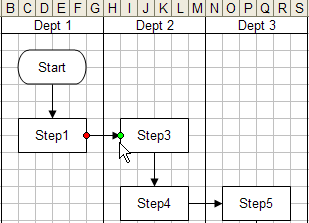
Picture 5
Note: When a connector is "connected" to a symbol, there should be a red dot on the end of it when the connector is selected. If it is unconnected, the dot will be clear.