Flowchart Tutorial
Working with Flowchart Connector Lines in Excel
By Nicholas Hebb
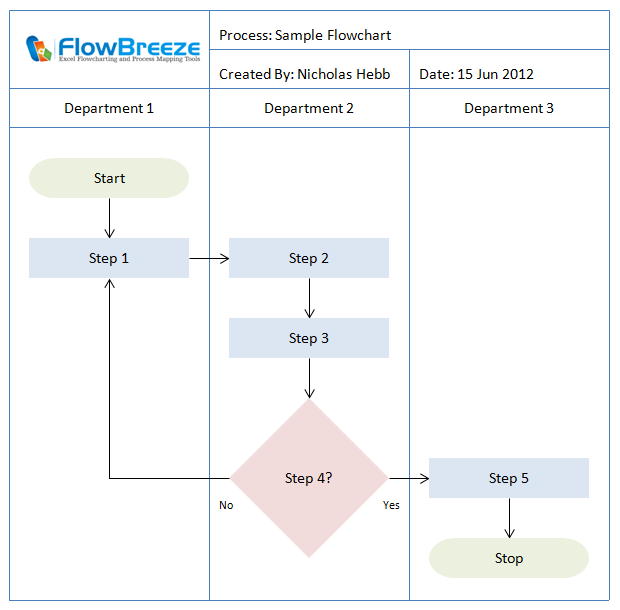
This article gives a detailed overview of working with the connectors in Excel. Connectors are the lines (typically arrows) that connect from one shape to another. They are called "connectors" because they stay connected to a shape when the shape is moved or resized. Most of the operations using connectors are sraight forward, but this article will cover them in depth and also discuss their limitations and some workarounds for common issues.
Excel Flowchart Wizard
FlowBreeze is a flowchart add-in for Microsoft Excel that makes creating flowcharts simple and pain free. Free 30-Day Trial.Adding a Connector
Before we talk abut the finer details of connectors, we need to add one to the drawing. Assuming that you already have a few shapes on the worksheet, you can add a connect by clicking the Insert tab, going to the Shapes dropdown and selecting one of the connector types in the Lines group, shown in the image below. (The three lines on the right - Curve, Freeform, and Scribble - are not connectors, and this article does not cover them.)

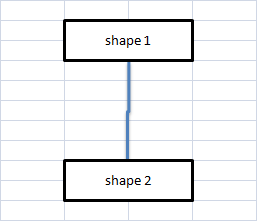
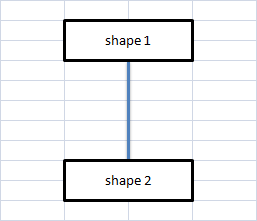
To add a connector line between two shapes, left-click on the first connection point and then drag the mouse to the second connection point and release, as shown in the two images below.
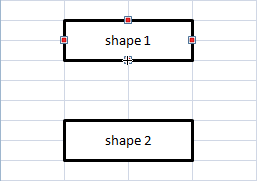
First connection point
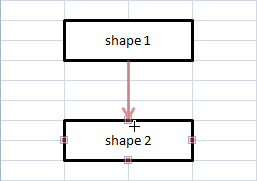
Second connection point
Connector Types
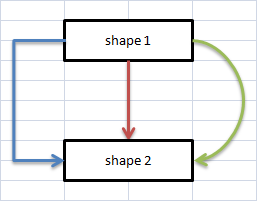
There are three basic types of connectors - straight, elbow, and curved. All three are shown in the image below.
After a connector is added to a drawing, you can change the type by right-clicking on the line, and selecting Connector Types from the context menu, as shown in the next image:
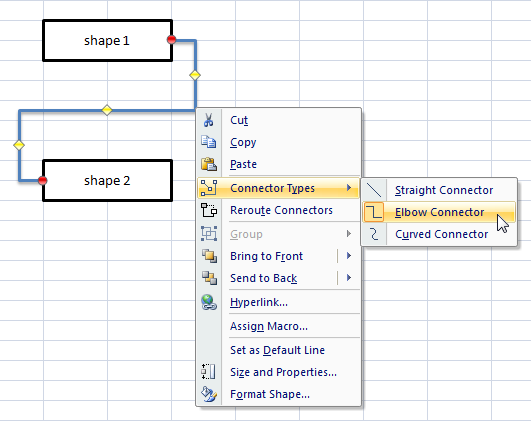
Connector Types
Line Routing Techniques
Kinks in Straight Lines
There is a common problem with Elbow Connectors that you should watch out for. If an elbow connector is routed in a straight line, a small kink appears in the middle of it. To fix the problem, right-click on the line and select Connector Types > Straight Connector to fix the issue.
Before: Elbow connector with kink
After: Changed to Straight connector
Merging Connectors
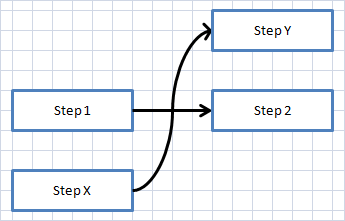
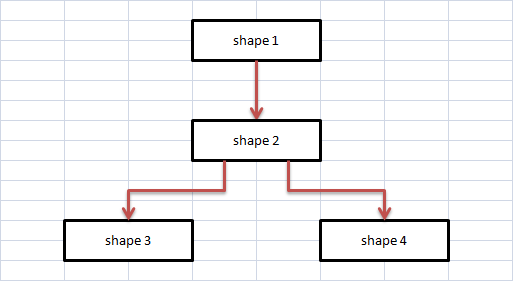
One common scenario is the need to route multiple connectors into or out of the same side on a shape. There are several strategies for dealing with this, as we show here:
| Merge Example | Description |
|---|---|
|
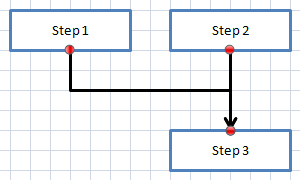
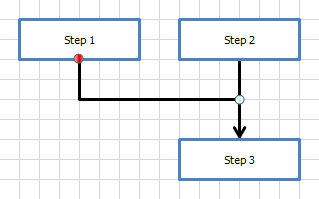
The easiest way to merge two connectors is just to route them to the same point. The two lines on the right overlap, but it is not noticeable. |
|
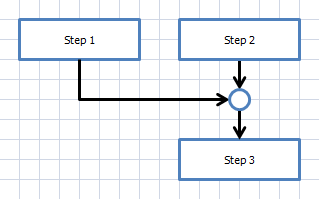
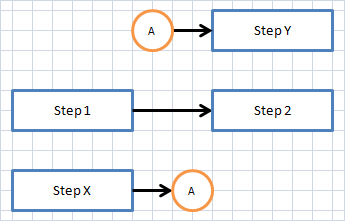
If you want a cleaner design or need to route multiple connectors, perhaps with different arrow directions, you can use a circle shape as a node. The circular shapes in Excel have 8 connection points. |
|
(Not recommended) Lastly, you could have one end of the connector free hanging in space. In Excel, connectors cannot connect to other lines. This can cause problems if you move the shapes around, change styles, or print. Excel tends to do unexpected things to free hanging connectors. |
Crossovers (lines crossing other lines)
| Crossover Example | Description |
|---|---|
|
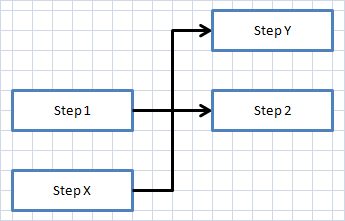
This is an example of what to avoid. It's a confusing crossover and hard to tell where the lines are routed. |
|
Ideally, a little jump would appear in the lines when they crossed over, like in Visio. But, since Excel does not have this feature, the following examples show alternate techniques. |
|
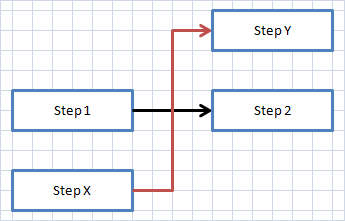
For display-only diagrams, you can change the color of one line to distinguish them. However, this tactic is ineffective for business documents where a person is likely to print in black and white. |
|
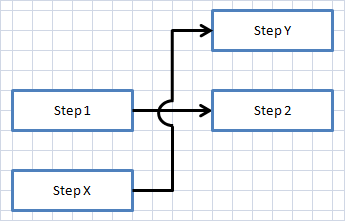
Another option is to change one connector type to curved. This is an easy and effective method. |
|
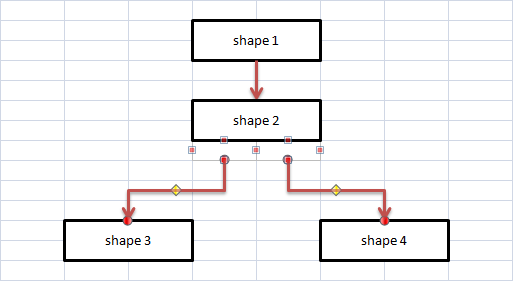
The best method, in my opinion, is to break the connector into parts and route them to labeled nodes. In Excel the name of the circular shape is also "Connector", which is a bit confusing. This technique is a little more work but it makes the layout cleaner for large diagrams and is more robust when moving shapes around. (NB: FlowBreeze has a built-in Split Connector tool to do this automatically.) |
Multiple Connection Points on a Shape
Although there are exceptions - such as circles - most of the shapes available in Excel have only one connection point per side. If you have two or more connectors routed into or out of a side, it can be hard to tell the lines apart. One technique to deal with this is to place empty textboxes under the target shape. The textbox is is in the shapes gallery and has an icon like this: ![]()
In this example, we added two textboxes and sized them to be half the width of the shape they will sit under, as shown in the image below.
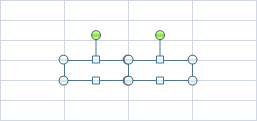
Next, we positioned the textboxes to sit where the intended target shape will be and routed the connectors to the textboxes.
Lastly, we moved the shape on top of the textboxes to give the illusion of multiple connection points. The shape and the textboxes can ge Grouped together in order for them to act as a single object if they are moved. Also, this trick can be done with more than two textboxes if you need additional connection points.
Setting the Line Style
When a connector is selected, the Format tab on the ribbon becomes visible. On the Format tab you will see a style gallery available (see image below), with 21 styles to choose from - 7 colors X 3 thicknesses.
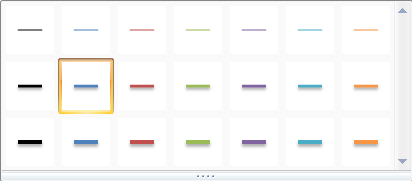
Line Style Gallery
(Note: The line styles changed in Excel 2013, and Excel 2016 added additional styles.)
Customizing the Line Format
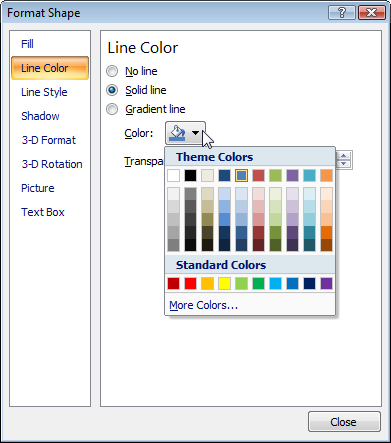
As we mentioned before, when you click on a connector, the Format tab becomes visible on the Excel ribbon. The settings we cover below can be accessed from the Format tab, and they can also be accessed by right-clicking on the connector and selecting Format Shape from the context menu. Because the Format Shape dialog is also used for regular shapes (i.e., not lines), there are some settings in it that do not apply to lines. However, it has one advantage over the ribbon - when the dialog is open, you can click on different shapes and the dialog will stay on top, allowing you to change multiple line settings quickly. We will show the most relevant options from the Format Shape dialog in these examples.
Line Color screen: You can change the line color beyond what is available in the style gallery.
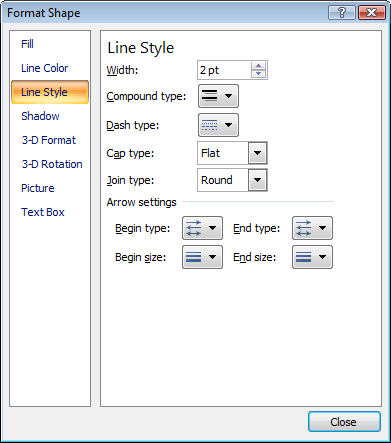
Line Style screen: The important settings on this screen are the Width, Compound type, Dash type, and Arrow settings.
The width is the line thickness. For reasons covered in the Avoiding Common Issues section below, I recommend not having a width greater than 2 pt. The compound style setting lets you set the line to look like two lines together (e.g., thick-thin).
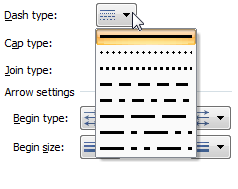
The Dash style has a number of dash and dotted line styles, as shown below. Dashed lines are often used to represent alternate routings.
Under Arrow settings, you can change the arrowhead type for the begin and end points, as shown below left. You can also change the arrowhead width and length, as shown below right.
Arrowhead Type
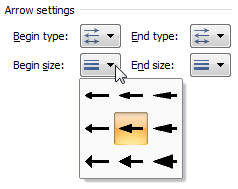
Arrowhead Size
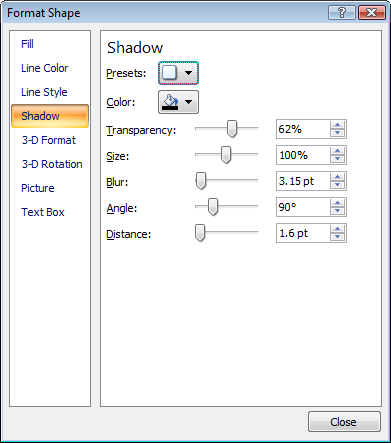
Shadow screen: The shadow screen has a drop down gallery of preset shadow types. It is worth noting that the default line shadow does not match up to any of the presets. Shadows can cause rendering problems and are covered below in the Avoiding Common Issues section.
Set as Default Line
After you have customized the formatting of a connector, if you want it to be the default style, you can right-click on the connector and select "Set as Default Line" from the menu. This will set the line style for all new connectors you add to the worksheet. The setting is not-persistent between Excel loads.
Avoiding Common Issues
Disappearing Lines
Occasionally Excel has some issues with connector lines disappearing from the screen or not showing up when a drawing is printed or saved to PDF. Common fixes are:
- Thick lines: To resolve this, I recommend that you don't use line widths greater than 2 pt.
- Line shadows: You can turn off the shadow by selecting the connector, clicking the Format tab, and then selecting Shape Effects > Shadow > No Shadow
- Connectors too close to the page edge: Avoid routing connectors on the left side of shapes in column A or B.
For display issues, usually you can just Page Down and then Page Up to have the lines re-rendered. Printing issues are a little tougher. If the tips in the bullet points above do not resolve the problem, you can select all the shapes in the drawing, click the Format tab and then click Group > Group.
Disconnected Connectors
Another issue is that connectors will become disconnected if you change the shape type via Format tab > Edit Shape > Change Shape. If you change a shape type, double check that all connectors are still connected. Drag the end point to reconnect it where needed.
Last Word
It should be painfully obvious from the header and sidebar that we make FlowBreeze, a flowchart add-in for Excel. It converts your text into a flowchart and automates many drawing-related tasks, including the ones covered in this article. I encourage you to try it it out, but even if you don't, I hope you found this article helpful.
About the Author
Nicholas Hebb
Nicholas Hebb is the owner and developer of BreezeTree Software, makers of FlowBreeze Flowchart Software, a text-to-flowchart maker, and Spreadspeed, an auditing and productivity toolset for Microsoft Excel®.