Using the Flowchart Wizard with Templates
There are several additional steps that need to be done to ensure that the resulting flowchart layout works when using the Flowchart Wizard with a template.
Shape Width
If the you are using a Letter sized template (8-1/2x11 or A4) with three or more swim lanes, you may need to change the default shape width in the FlowBreeze settings. For example, a 3-lane template generated for a letter-sized page will have lane widths of 10, 10 and 9. The means that the smallest lane (9 grid columns) will accommodate a shape width of 7 (with a one column padding on each side).
To change the maximum shape width:
- Click Settings from the FlowBreeze toolbar.
- On the symbol List tab, click "Edit Dimensions".
- Change the Width setting and click OK to close the Dimensions form.
- Click OK on the Settings form.
Input
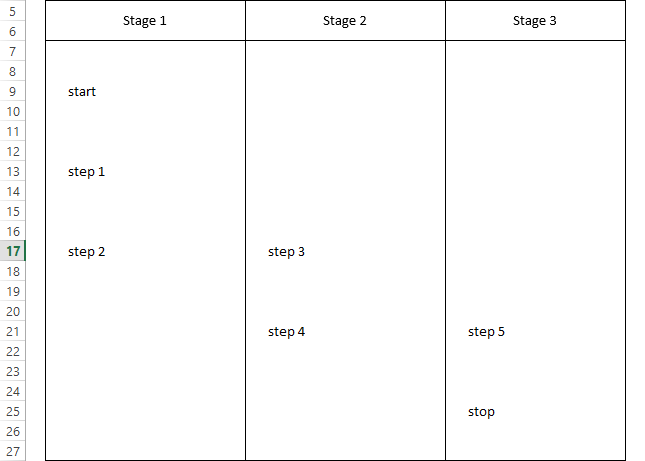
The image below shows the text in a swim lane template pre-arranged prior to running the Flowchart Wizard. For best results:
- For the shape to be generated in a given lane, the text should be in that lane.
- The text should be offset within the lane to ensure that the left or top edge of the shape does not abut the swim lane diver lines.
- You do not have to space the rows apart as they are shown below, but typically the more finely tuned the input arrangement, the less you will need to adjust the layout after running the wizard.
Running the Flowchart Wizard
In Step 1 of the wizard, you will need to check the "Input uses a swim lane template?" option. This will result in the flowchart being added to the existing template sheet instead of a new worksheet. Note: In the Spacing Between Sheets settings, the Columns setting is ignored for vertical swim lanes, and the Rows setting is ignored for horizontal swim lanes.
The remainder of the wizard operations are the same as running it without a template.